Overview
Getting started with Dashboardly takes four steps in a single guided onboarding flow:
- Create Account -- enter your name, email, and password
- Email Verification -- confirm your email address
- Connect TikTok Shop -- authorize Dashboardly to read your shop data
- Select Plan -- start your 14-day free trial on the plan that fits
The whole flow takes about 5 minutes. Once it is done, your data starts importing in the background and you can begin using Dashboardly immediately.
This article walks you through each step. To connect additional shops later (after onboarding), see How to Connect Multiple TikTok Shops.
Step 1: Create Your Account
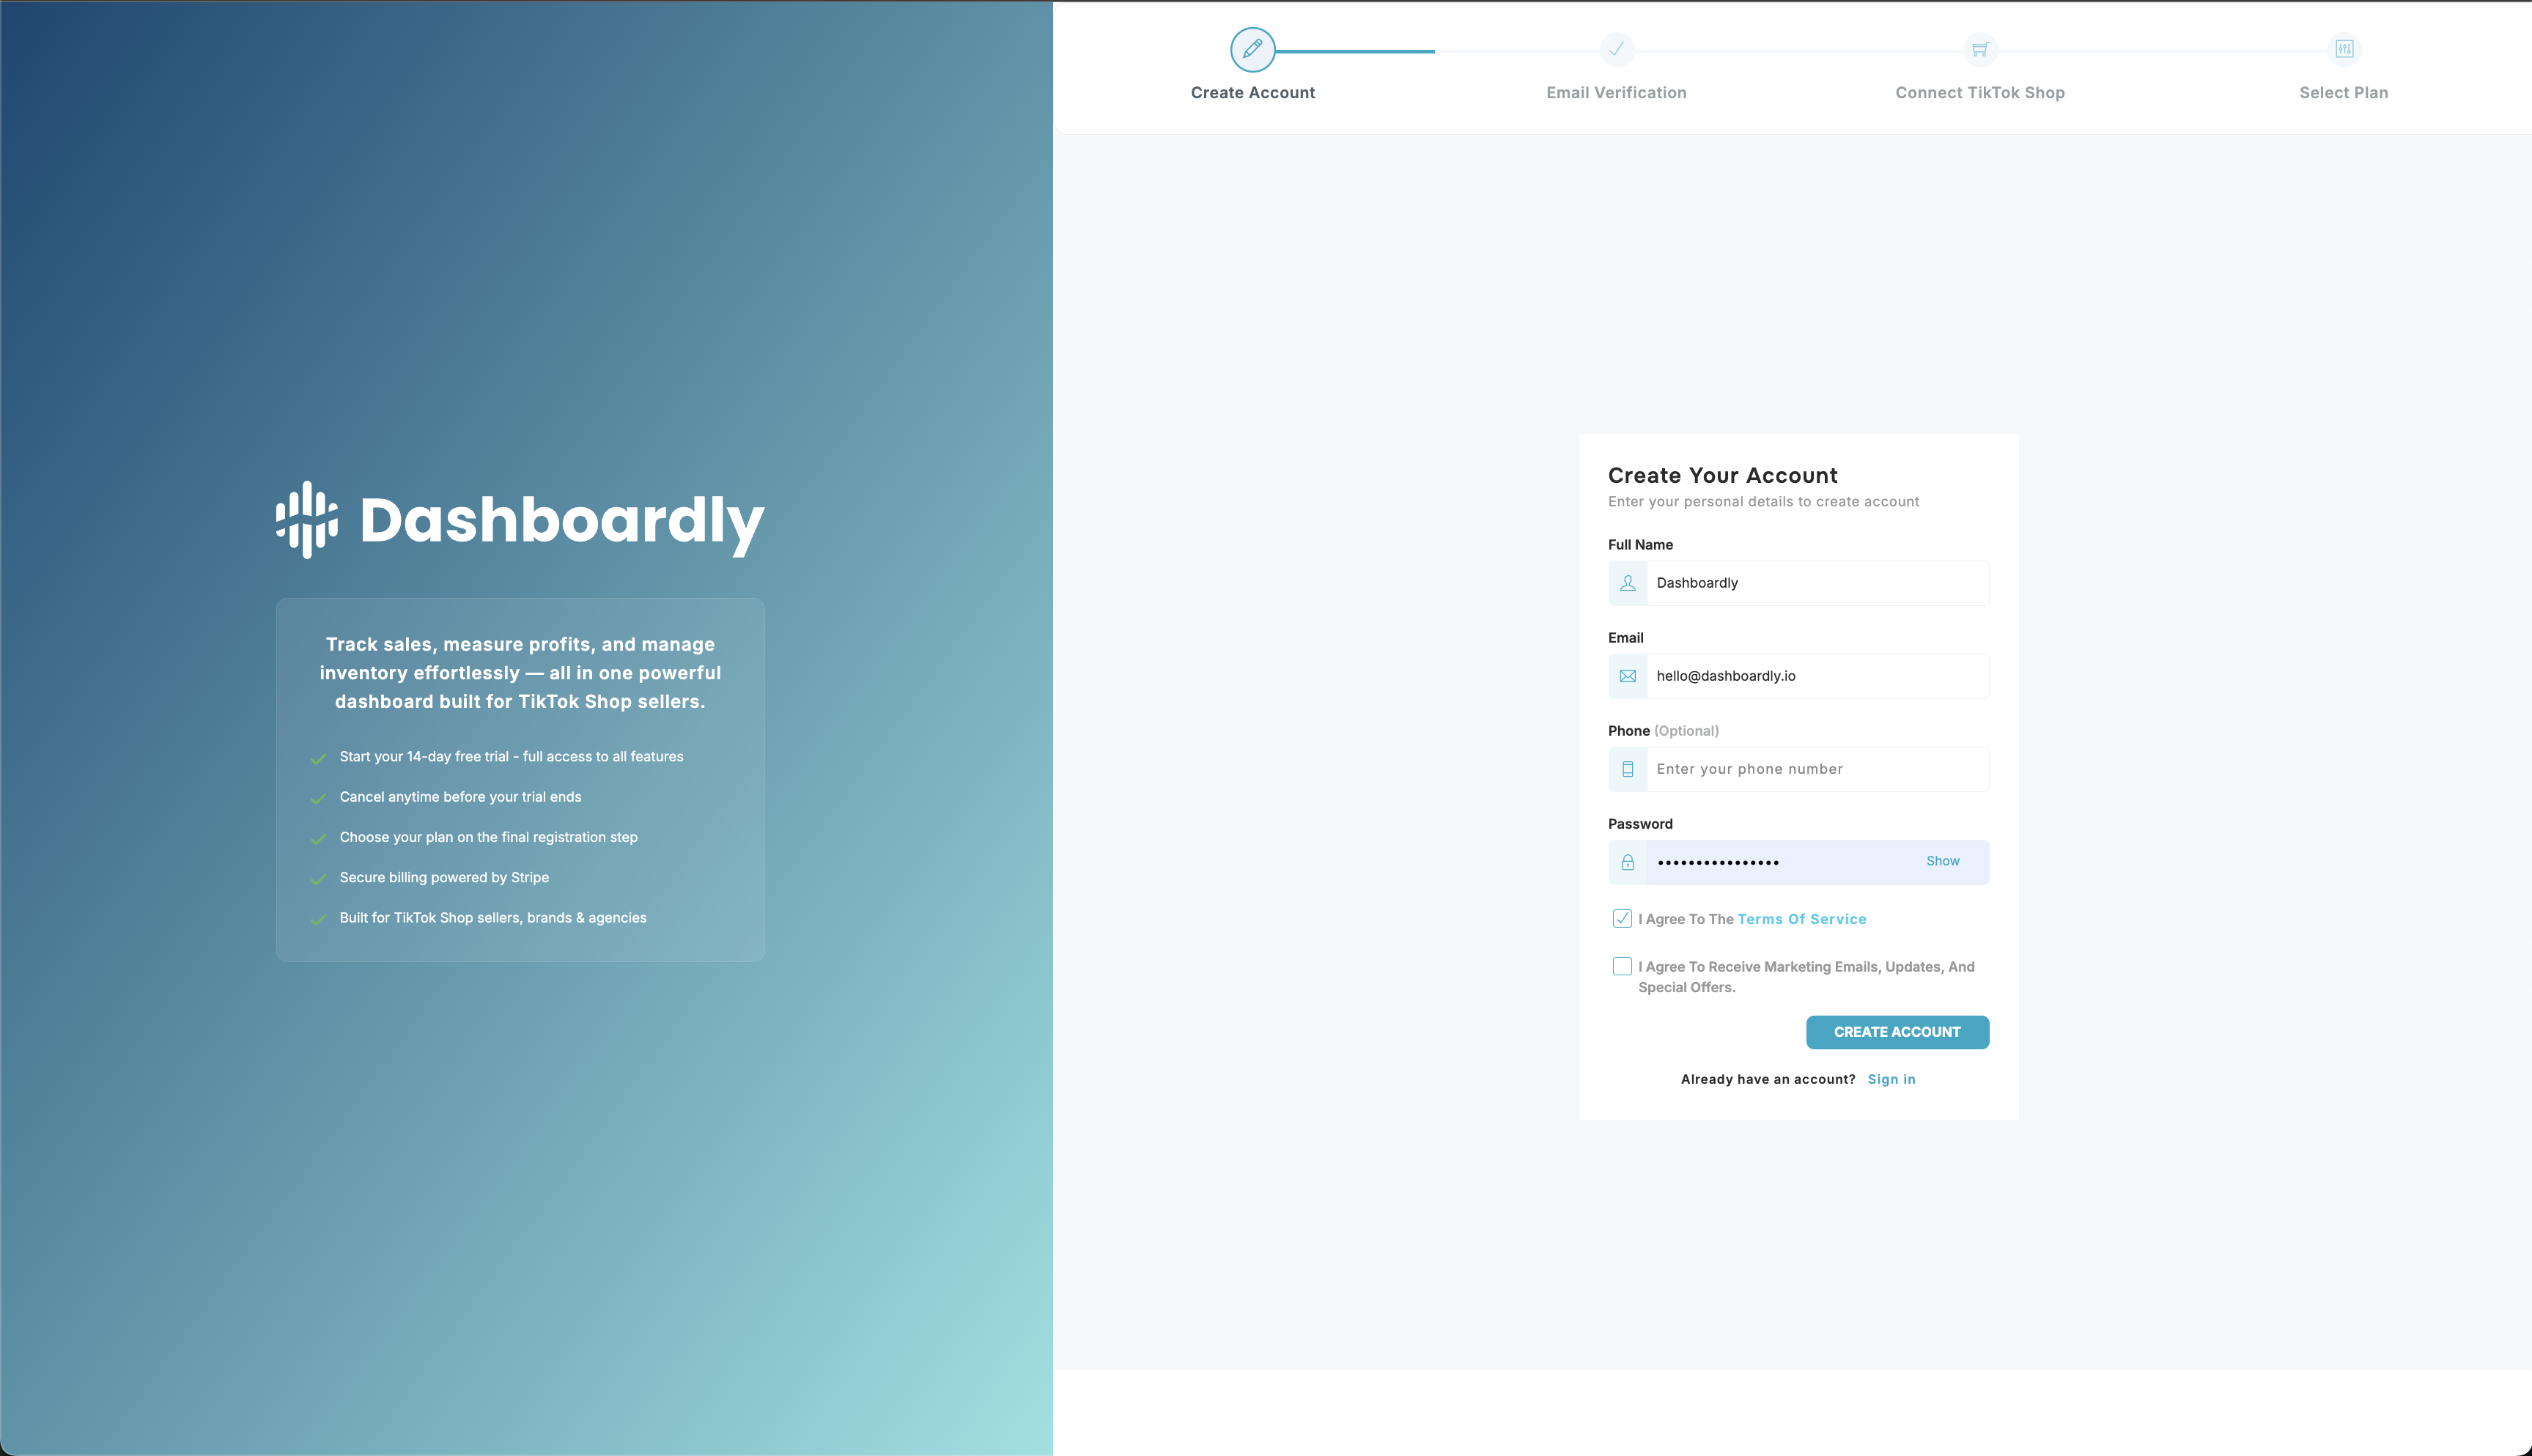
Open the Dashboardly signup page and fill in:
- Full Name -- your name as you want it to appear in the app
- Email -- the email you will use to log in. Verification will be sent here.
- Phone (optional) -- not required, can be left blank
- Password -- a strong password you will remember
Read and check the box for I Agree To The Terms of Service. The marketing-email checkbox is optional.
Click Create Account to continue.
Already have an account? Click Sign in at the bottom of the form to log in instead.
Step 2: Verify Your Email
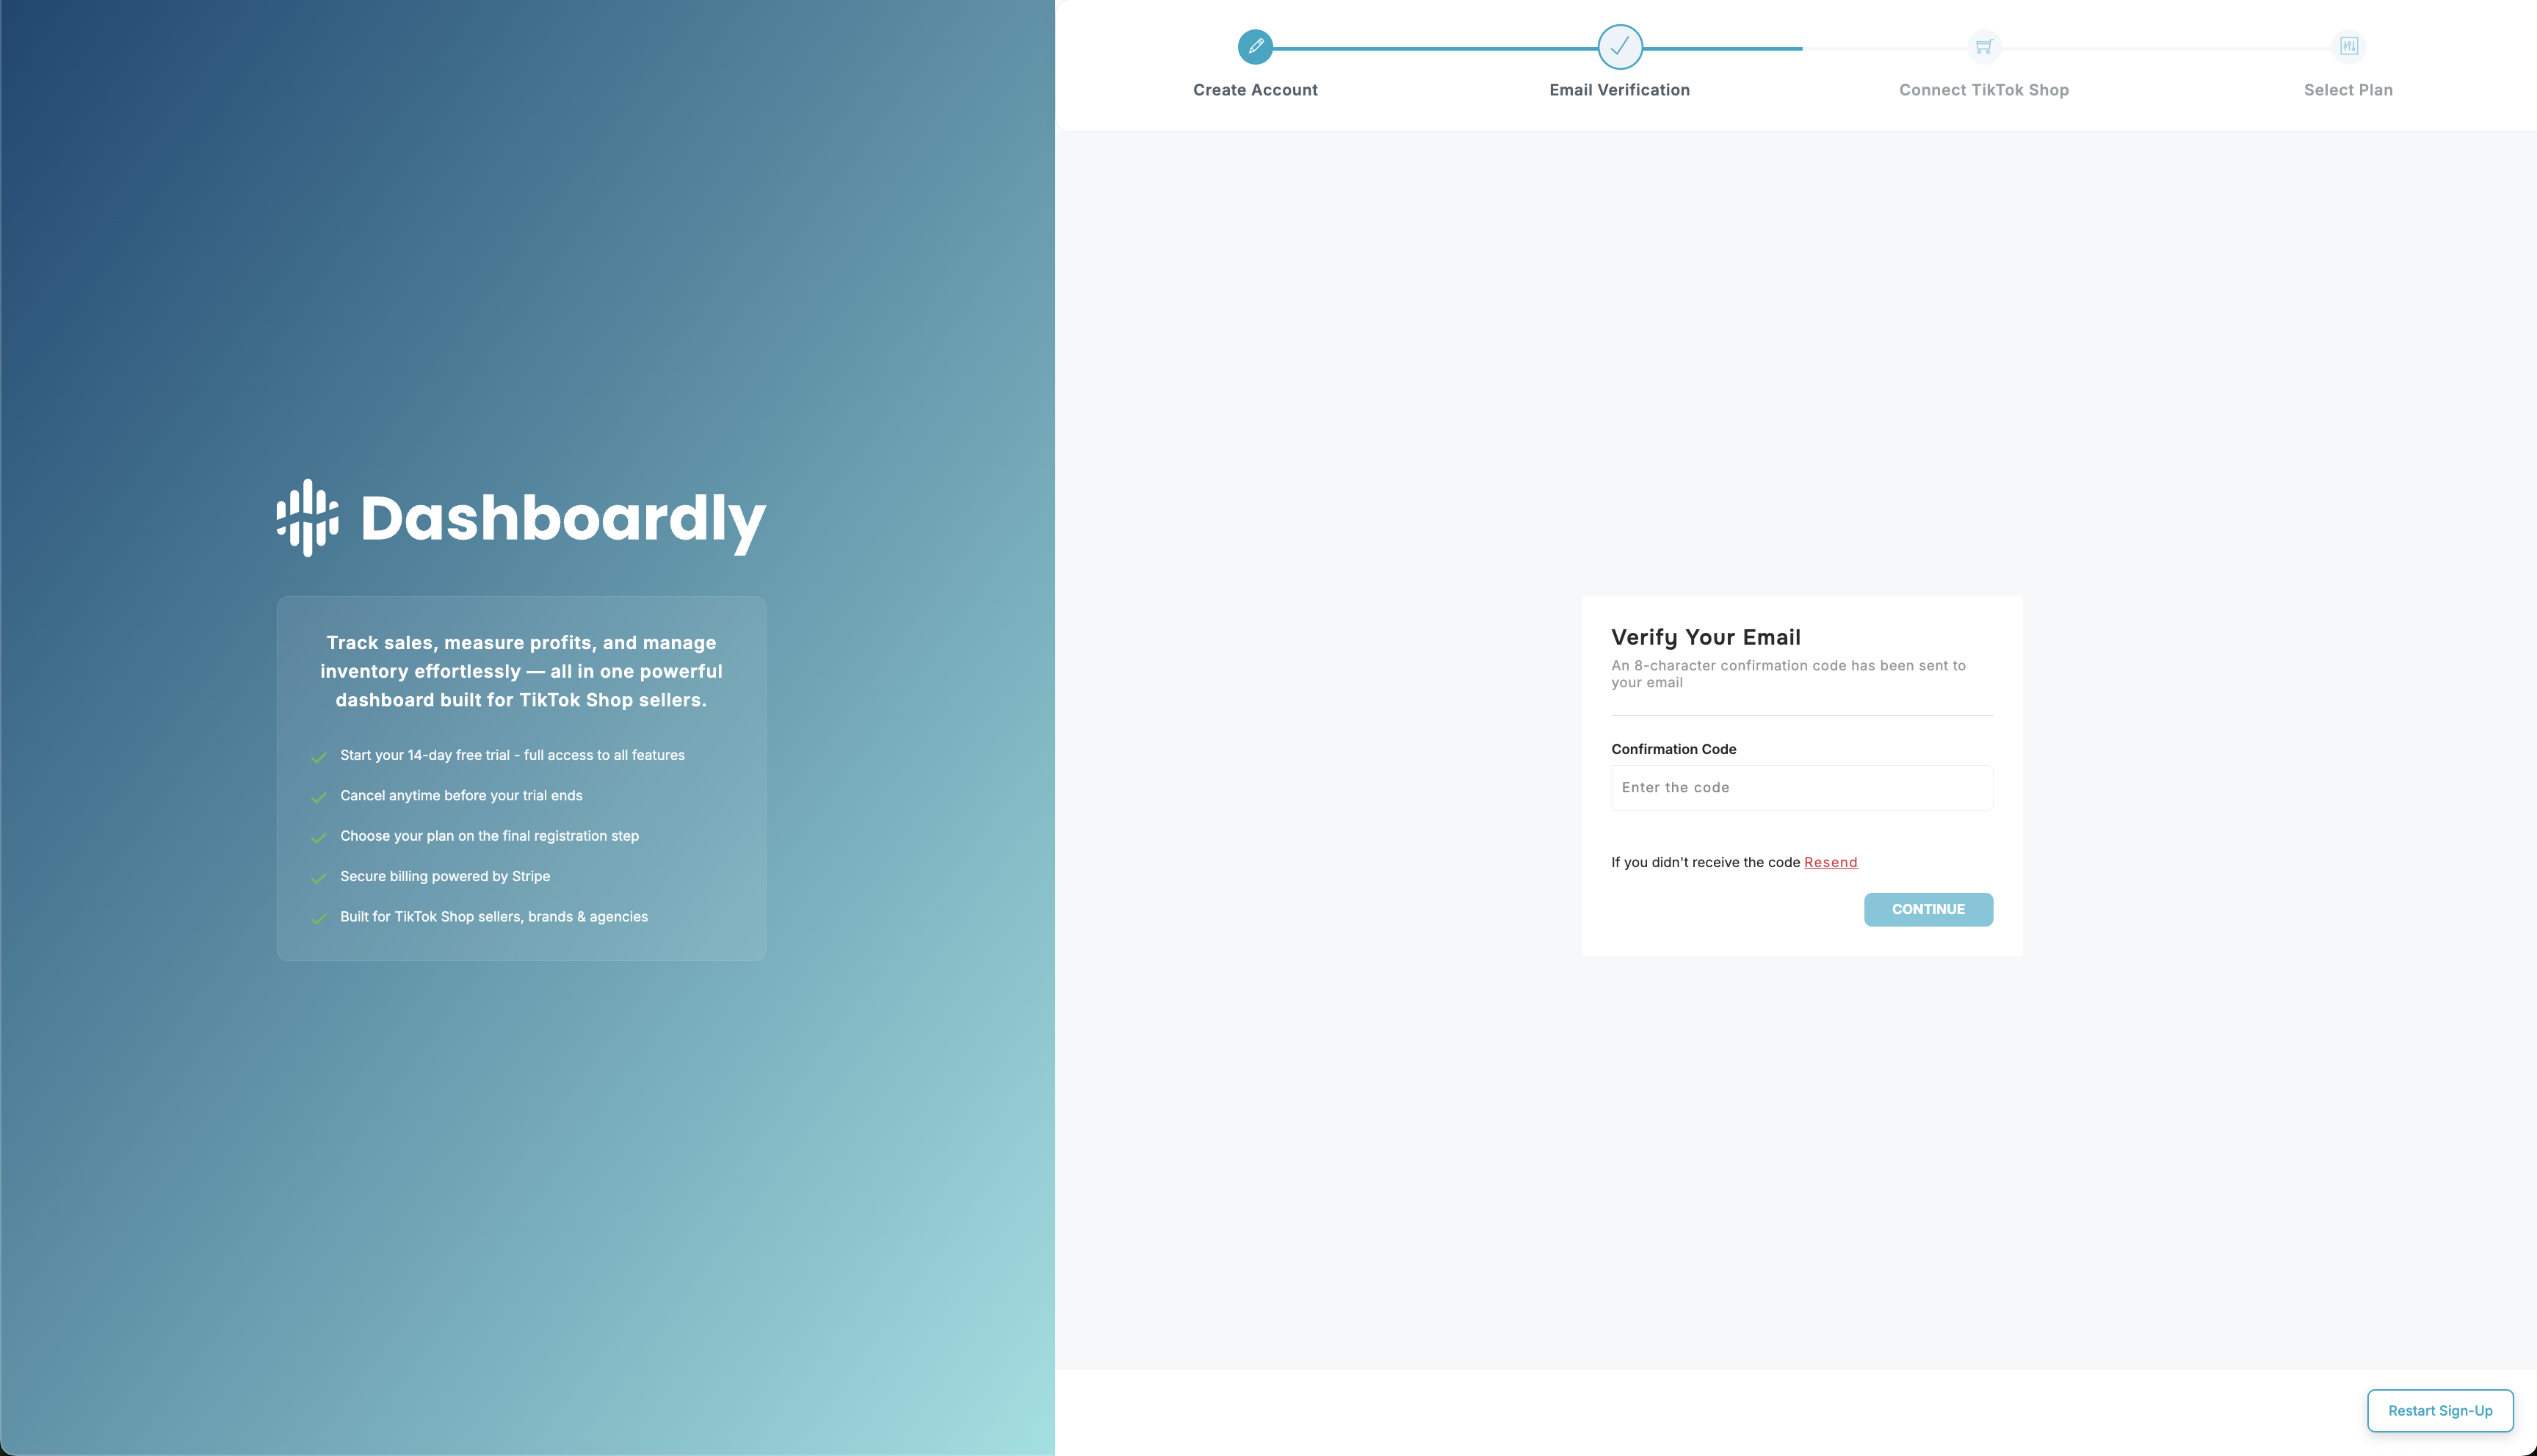
After creating your account, Dashboardly sends a verification email to the address you entered. Open the email and click the verification link, or enter the verification code shown on screen.
Did not receive the email?
- Check your spam or junk folder.
- Make sure the email address you entered is correct.
- Click Resend on the verification screen to get a new email.
Once your email is verified, you move to the next step automatically.
Step 3: Connect Your TikTok Shop
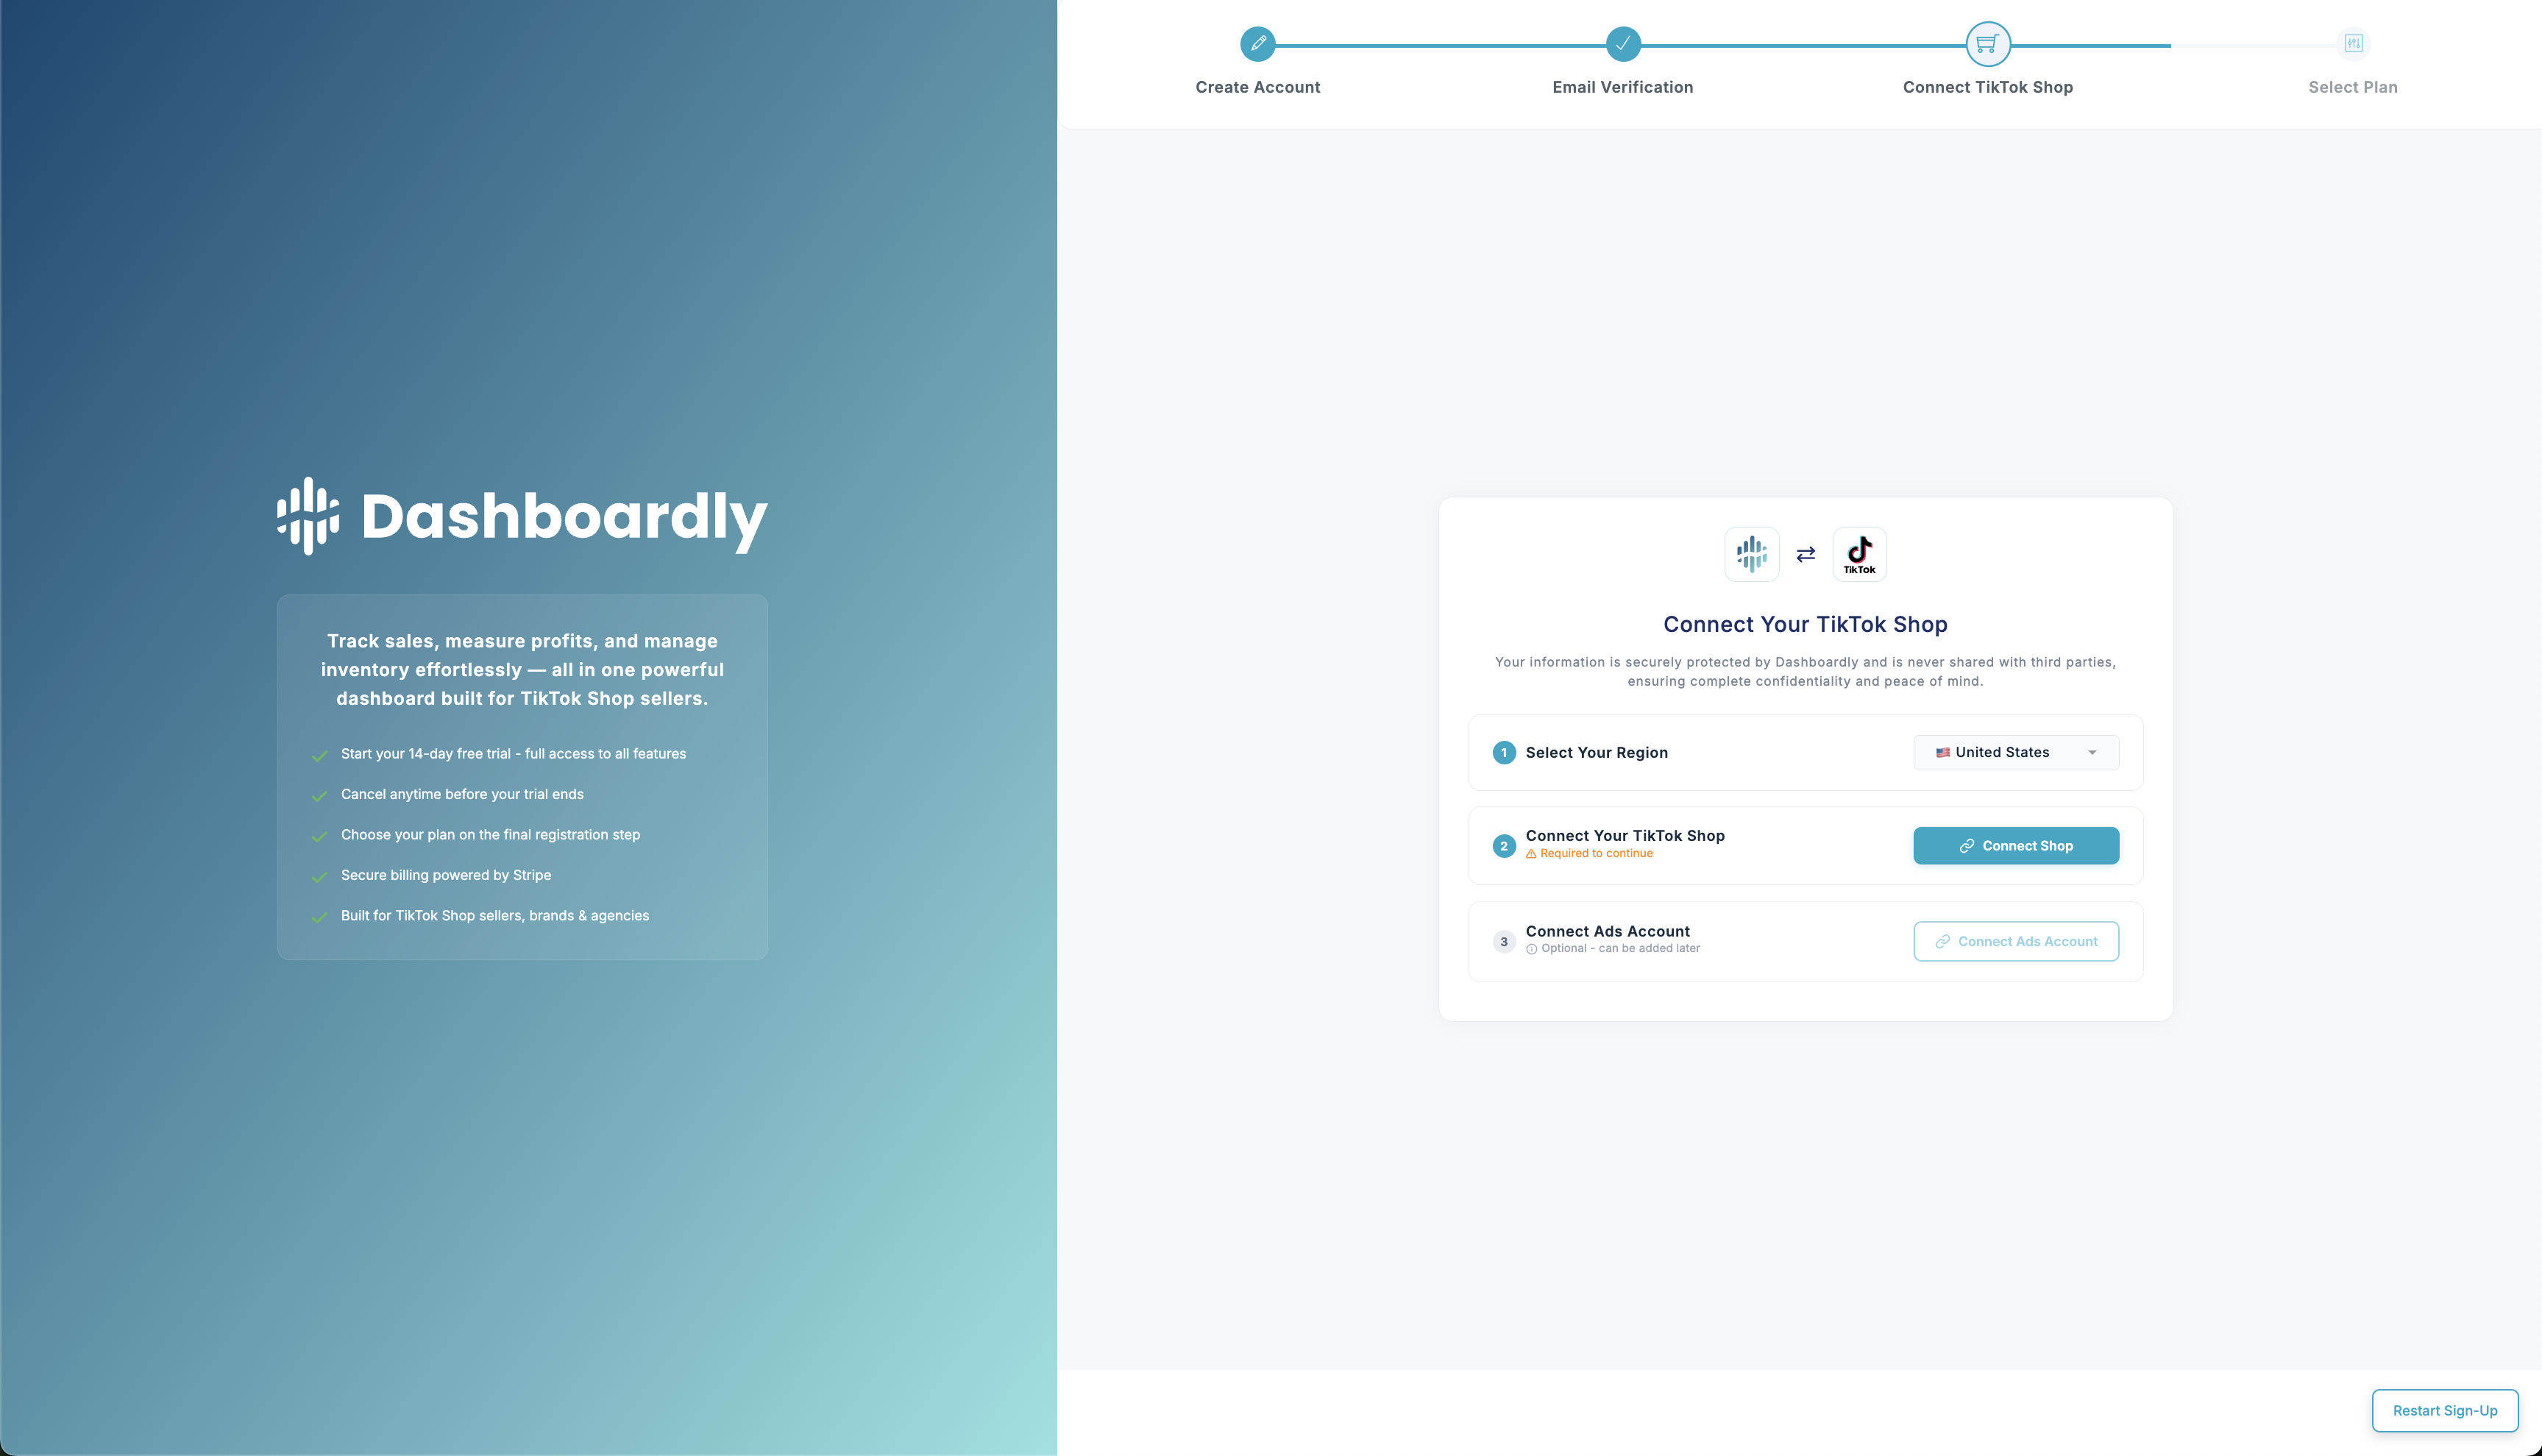
This is where you authorize Dashboardly to read your shop's data. The connection uses TikTok's official authorization system (OAuth) -- Dashboardly never sees or stores your TikTok password.
The flow:
- Select your shop's region (US, UK, DE, and so on). This determines which TikTok login domain you are sent to.
- Log in to TikTok Seller Center with the account that owns the shop you want to connect.
- Review and approve permissions. Dashboardly requests read-only access to:
- Products -- your catalog and inventory
- Orders -- your order history and details
- Finance -- settlements, statements, and transactions
- Returns / Refunds -- return and refund records
Dashboardly cannot create, modify, or delete anything in your shop.
- Return to Dashboardly. TikTok redirects you back automatically. Your shop now appears in your account, and the initial data import begins.
Tips for a smooth connection:
- Use the shop owner TikTok account, not a sub-user.
- Allow pop-ups from
*.tiktok.comso the login window can open. - Match the region exactly -- US shops cannot be authorized through the UK login domain.
For deeper detail on the import that starts after authorization, see How Data Import Works.
Step 4: Select Your Plan
The final step is choosing your plan. Dashboardly offers two families:
- Brand plans for sellers managing their own TikTok Shops (Starter, Growing, Pro)
- Agency plans for agencies managing multiple client shops (Agency Starter, Agency Growth, Agency Pro)
You also choose your billing frequency:
- Monthly -- pay each month, cancel anytime
- Annual -- save about 20%
Your 14-day free trial starts now. A credit card is required to begin, but you are not charged until the trial ends. You can cancel anytime during the trial without being charged.
Pick the plan that matches your shop size and order volume. You can always upgrade or downgrade later from Settings > Subscription. For full plan details, see Plans and Billing.
After Onboarding
You now have full access to Dashboardly. While you explore, your data is importing in the background:
- Products and inventory -- usually populated within the first few minutes
- Order history -- can take from a few minutes (small shops) up to a few hours (large shops)
- Settlement data -- arrives as TikTok finalizes orders
Recommended next step: set your COGS so profit metrics are accurate. Without COGS, Margin and ROI cannot be calculated. See Setting Up Cost of Goods (COGS).
Common Issues
"Email already in use" when creating an account
You may already have a Dashboardly account on this email. Click Sign in instead, or use Forgot password to recover access.
Verification email not arriving
Check your spam folder, verify the address is spelled correctly, and click Resend on the verification screen. If it still does not arrive, contact support.
TikTok authorization failed or shows "Connection error"
- Confirm you logged in with the TikTok account that owns the shop, not a sub-user.
- Clear your browser cookies for TikTok and try again.
- If you recently changed your TikTok password, log into TikTok Seller Center first to confirm your account is active, then retry.
"Shop already connected"
The shop is already linked -- either to your Dashboardly account or to another Dashboardly account. If it was connected to a different Dashboardly account, you will need to disconnect it there before linking it here.
Connection completes but no data appears yet
Normal during the first few minutes -- the import is still running. Check progress in Settings > Shops. See How Data Import Works for typical durations.
Token Expiration and Reconnecting Later
TikTok authorization tokens expire periodically. Dashboardly refreshes them automatically, but in rare cases the refresh may fail. If that happens, the affected shop appears in a Disconnected Shops section in Settings > Shops. Click Reconnect to re-authorize -- you keep all your existing data and settings.
Adding More Shops Later
The flow above connects your first shop. To add another -- for example, a second region or a separate brand -- use the Add Shop button in Settings > Shops. Plan limits apply. See How to Connect Multiple TikTok Shops for the full walkthrough and shop-count limits per plan.